/
Expense - Submitting an Expense Claim
Expense - Submitting an Expense Claim
Create an Expense Claim
The following steps outline instructions to submit an expense claim in Unit4.
- Navigate to "My Employment" and click on "Expenses".
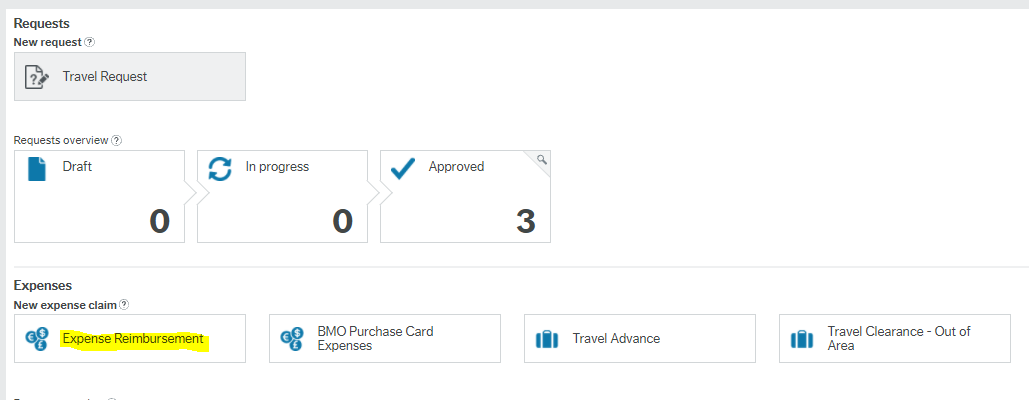
- In the expenses screen, click on "Expense Reimbursement".
- The following screen will open. Complete the highlighted fields:
- "On behalf of resource" – this is your name, you cannot submit an expense on behalf of someone else (unless you are set up as an Expense Keeper).
- "Purpose" – enter the reason for the expense.
- "Date" – this is the date of expense. If you are submitting mileage for an entire month, simply use the date of submission.
- "Work Order" – enter the work order responsible for paying the cost.
- Click on "Add expense" in the lower left corner to add the expense line.
To submit additional expenses, select "Add expense" for each expense item.
- "Category" – this field gives you a drop-down menu of expense types to select.
- "Expense Date" – this is the date of expense item.
- "Description" – this field is where you can give details regarding your expense.
"Amount" – this is where you enter the expense total. DO NOT deduct GST from this line, it should be the total expense amount from your receipt.
"P4-GST"/"P5-PST" - Enter the GST and/or PST into the fields labelled P4-GST and P5-PST, respectively.
Upload a Receipt
- Review "Expenses Overview", located to the far right-hand section. Here you will see the ability to upload and match your receipts, and review your expense claim total.
- To upload a receipt, select "Receipts" > "Add or Show Receipts".
- If you have not uploaded any receipts, select "Upload receipts" to find a scanned receipt saved on your computer:
- If you have uploaded receipts that are not matched, you will see these open first. To upload a new receipt, select the "Upload receipts" button at the bottom of the screen:
- If you have not uploaded any receipts, select "Upload receipts" to find a scanned receipt saved on your computer:
Match a Receipt to an Expense
- To match a receipt to your expense item:
- Select the checkbox beside the expense line you wish to match
- Note: you can only match one expense line at a time
- You will see the "Match to receipt" button turn blue, indicating a match is ready. Click to match.
- Once matched, a confirmation window will open:
- Note: if you've matched a receipt in error, click the "Undo" button.
- Note: if you've matched a receipt in error, click the "Undo" button.
- Select the checkbox beside the expense line you wish to match
- To delete a receipt or document uploaded in error:
- navigate to "Actions" and select "Delete receipt" from the dropdown list.
A confirmation window will open asking you to confirm deletion.
- navigate to "Actions" and select "Delete receipt" from the dropdown list.
- Once you have matched each expense line to a receipt, you will see a paperclip icon ()indicating a matched receipt:
***NOTE: You must upload and match a receipt for all expense lines. Expect to see an error code if your forget to upload and match your receipts to each expense line. - Select "Send for approval" to submit.
, multiple selections available,
Related content
Expense - Mobile App
Expense - Mobile App
Read with this
Travel - Submitting a Travel Request, Advance and Clearance
Travel - Submitting a Travel Request, Advance and Clearance
Read with this
Employee Resources - Finance Module
Employee Resources - Finance Module
Read with this
Finance FAQs
Finance FAQs
Read with this
Timesheet & Absence Codes - Summary and Definition (Unit4)
Timesheet & Absence Codes - Summary and Definition (Unit4)
More like this
Logging-on to Unit4 (Finance/HR/Payroll)
Logging-on to Unit4 (Finance/HR/Payroll)
Read with this


